Anytls example
In WHMCS
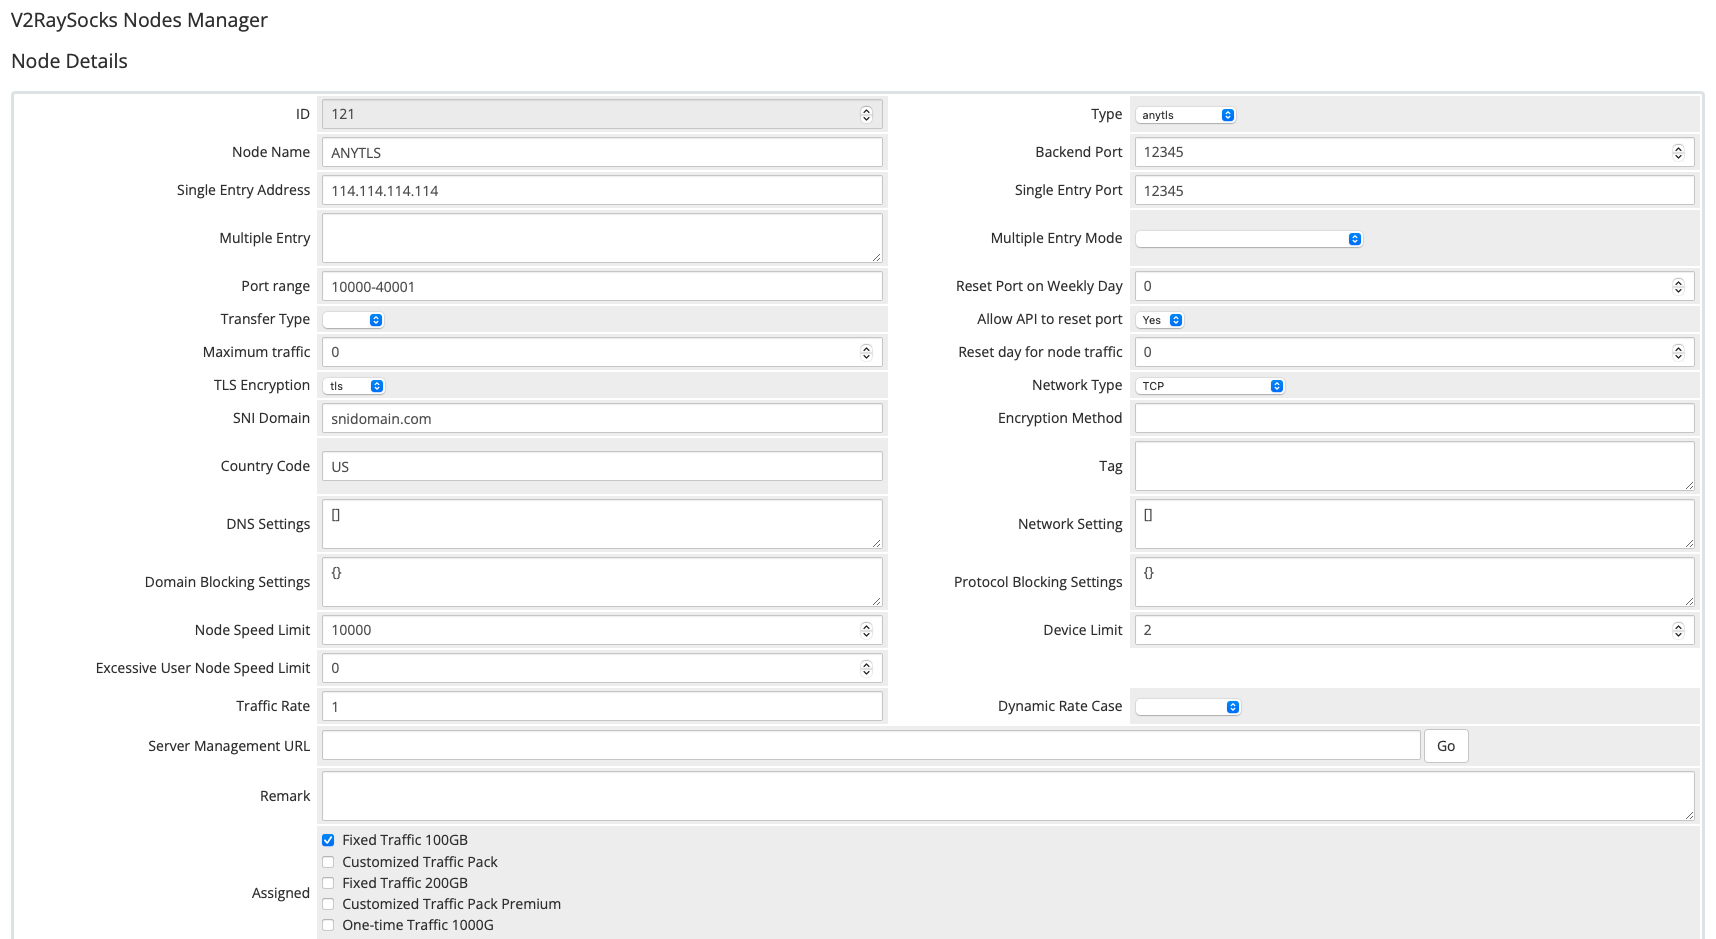
anytls
Install
Manual
Please install the V2bX backend using the following command:
wget -N https://raw.githubusercontent.com/theresaarcher/V2bX-script/master/install.sh && bash install.sh
After installation, edit the configuration file /etc/V2bX/config.json as shown below:
{
    "Log": {
        "Level": "error",
        "Output": ""
    },
    "Cores": [
    {
        "Type": "sing",
        "Log": {
            "Level": "error",
            "Timestamp": true
        },
        "NTP": {
            "Enable": false,
            "Server": "time.apple.com",
            "ServerPort": 0
        },
        "OriginalPath": "/etc/V2bX/sing_origin.json"
    }],
    "Nodes": [{
            "Core": "sing",
            "ApiHost": "https://domain.com/modules/addons/v2raysocks_nodes/web_api.php",
            "ApiKey": "123456",
            "NodeID": 123,
            "NodeType": "anytls",
            "Timeout": 30,
            "ListenIP": "::",
            "SendIP": "0.0.0.0",
            "DeviceOnlineMinTraffic": 200,
            "TCPFastOpen": false,
            "SniffEnabled": true,
            "CertConfig": {
                "CertMode": "self",
                "RejectUnknownSni": false,
                "CertDomain": "snidomain.com",
                "CertFile": "/etc/V2bX/fullchain.crt",
                "KeyFile": "/etc/V2bX/private.pem",
                "Email": "v2bx@github.com",
                "Provider": "cloudflare",
                "DNSEnv": {
                    "EnvName": "env1"
                }
            }
        }]
}
Then upload your certificate files fullchain.crt and
private.pem to the directory /etc/V2bX/.
After configuration, start the V2bX backend using the following command:
v2bx
To restart or check the service status, use:
v2bx
V2bX will start automatically after the server reboots.